Howto Add Custom Fields
1. From the "List menu", Select List ID then click on the "Choose Action" then select Modify.
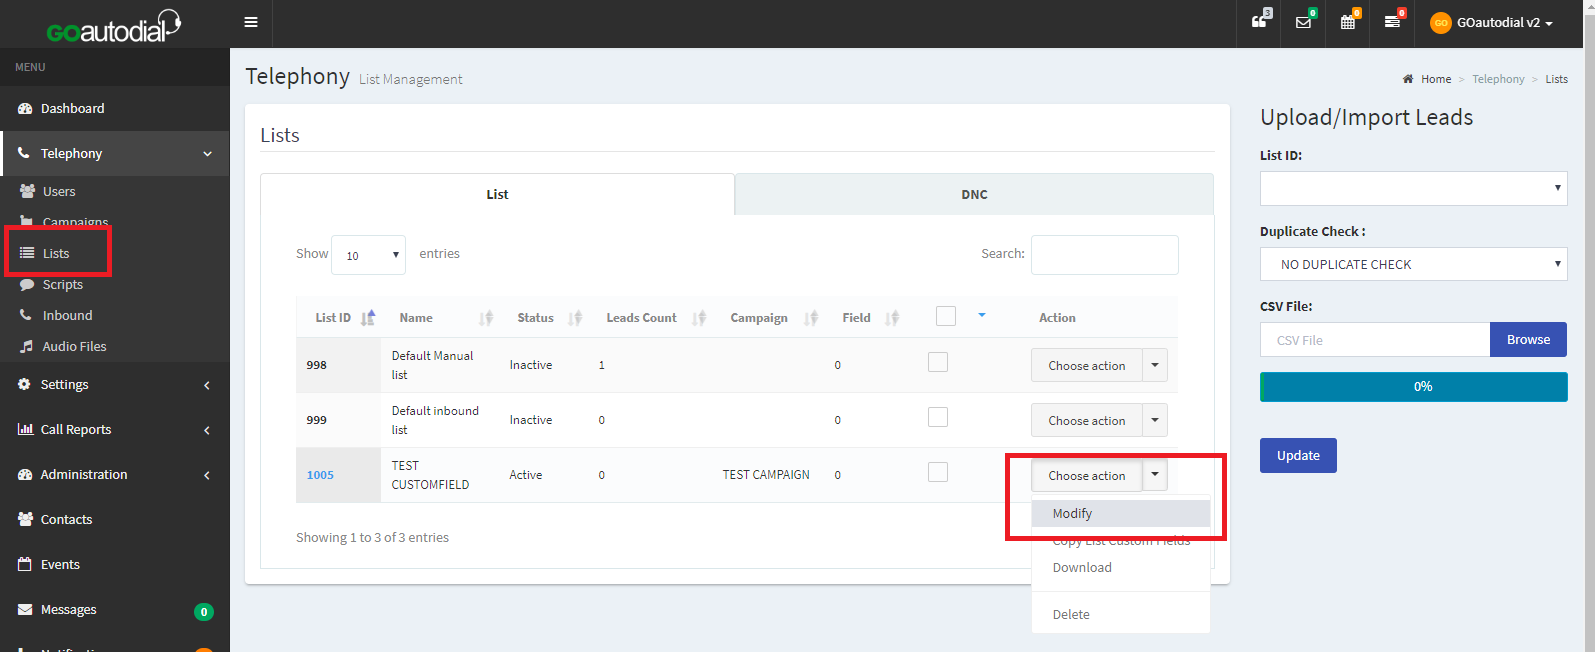
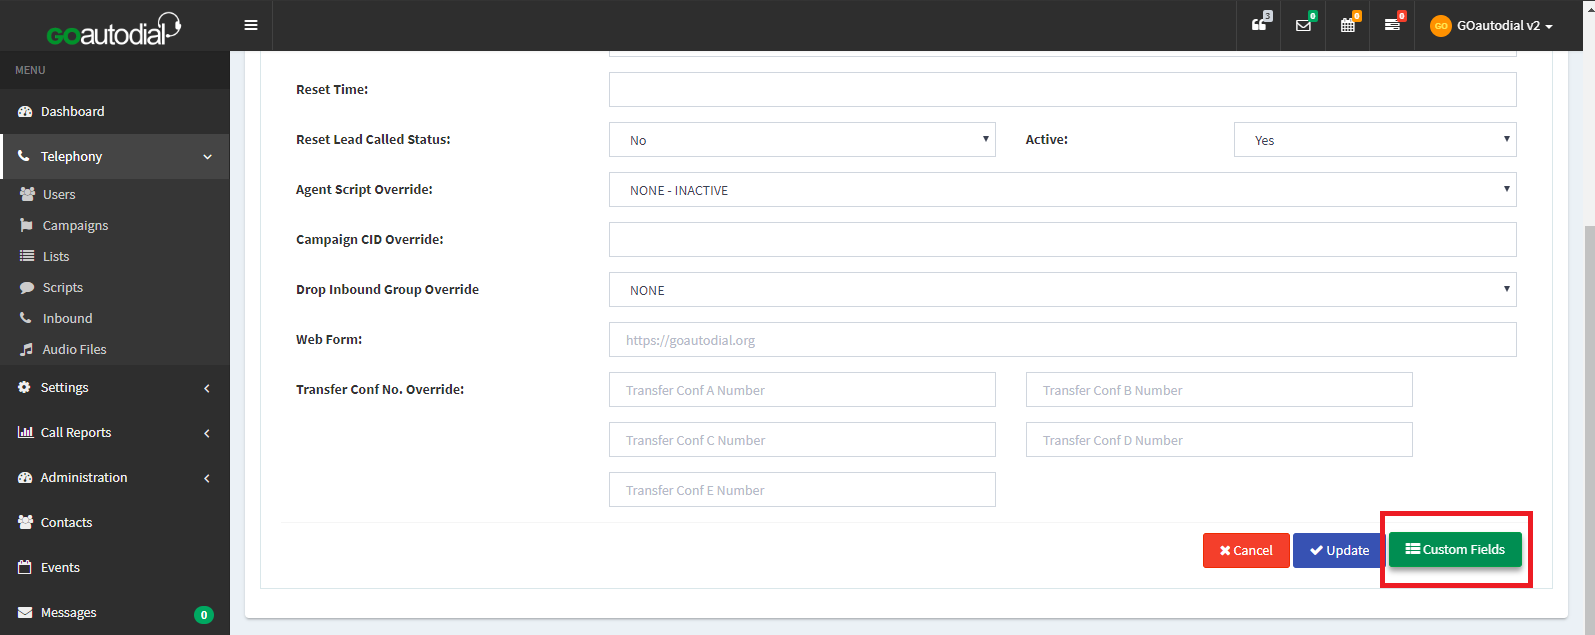
2. Click "Custom Fields" button to add custom fields to your list. Click "Create Field" once you've fill out the Fields.
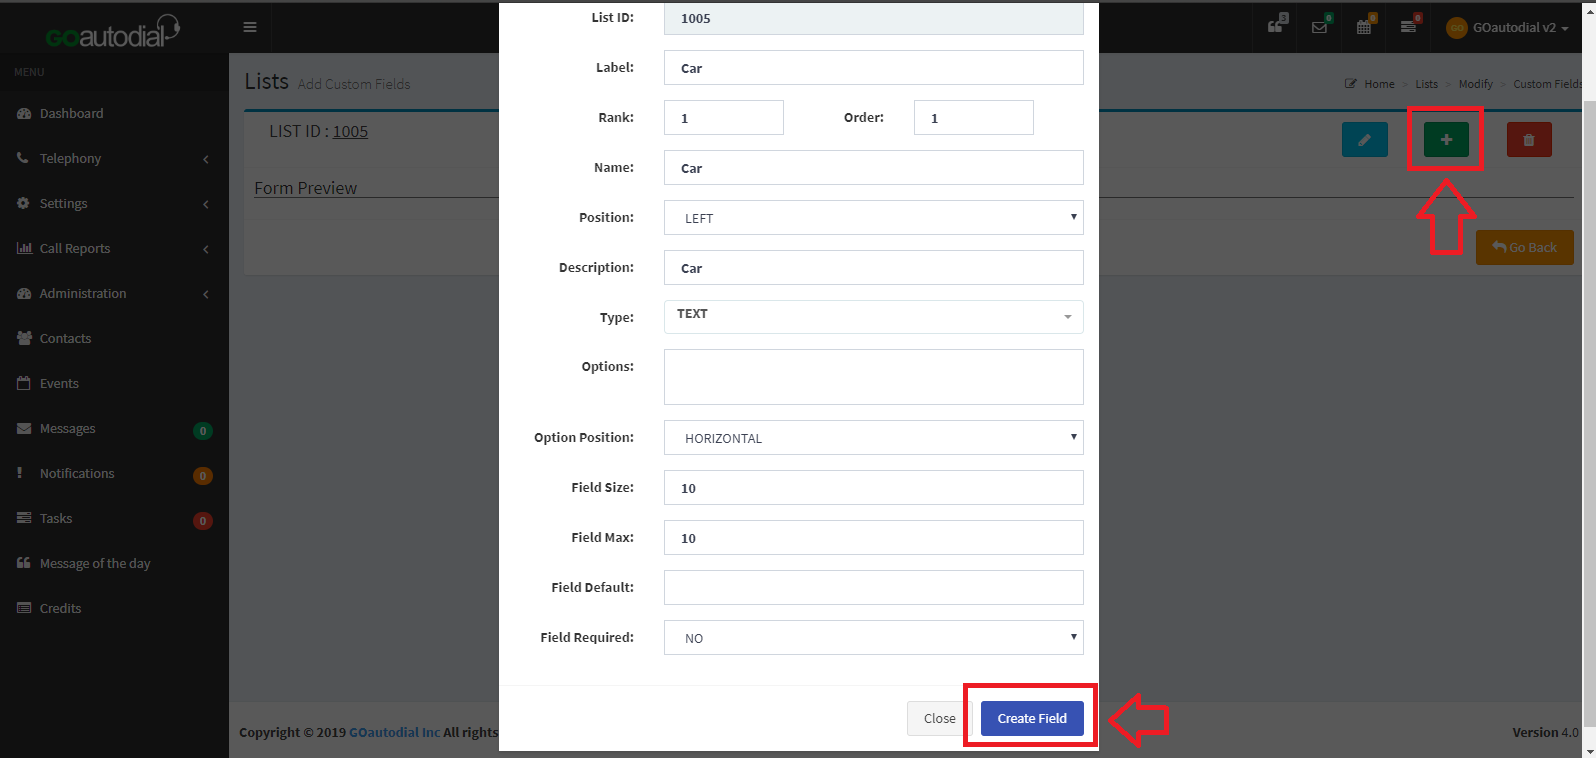
REMINDER:
Label = Do not use special characters or spaces and existing fields like:
Name = This field will show on the agents screen and when you are uploading leads.
Options = This should be the same with "Labels" and should be in between "--A--" sample "--B--". i.e. --A--company_name--B--
Option Position = The direction of custom field that will appear on agent UI
Field Size = Text box size that will show on the agent UI
Field Max = Max character that you can input on the custom field
3. Confirmation message click "Yes create custom field" and notification will pop "Custom Field Successfully Created"
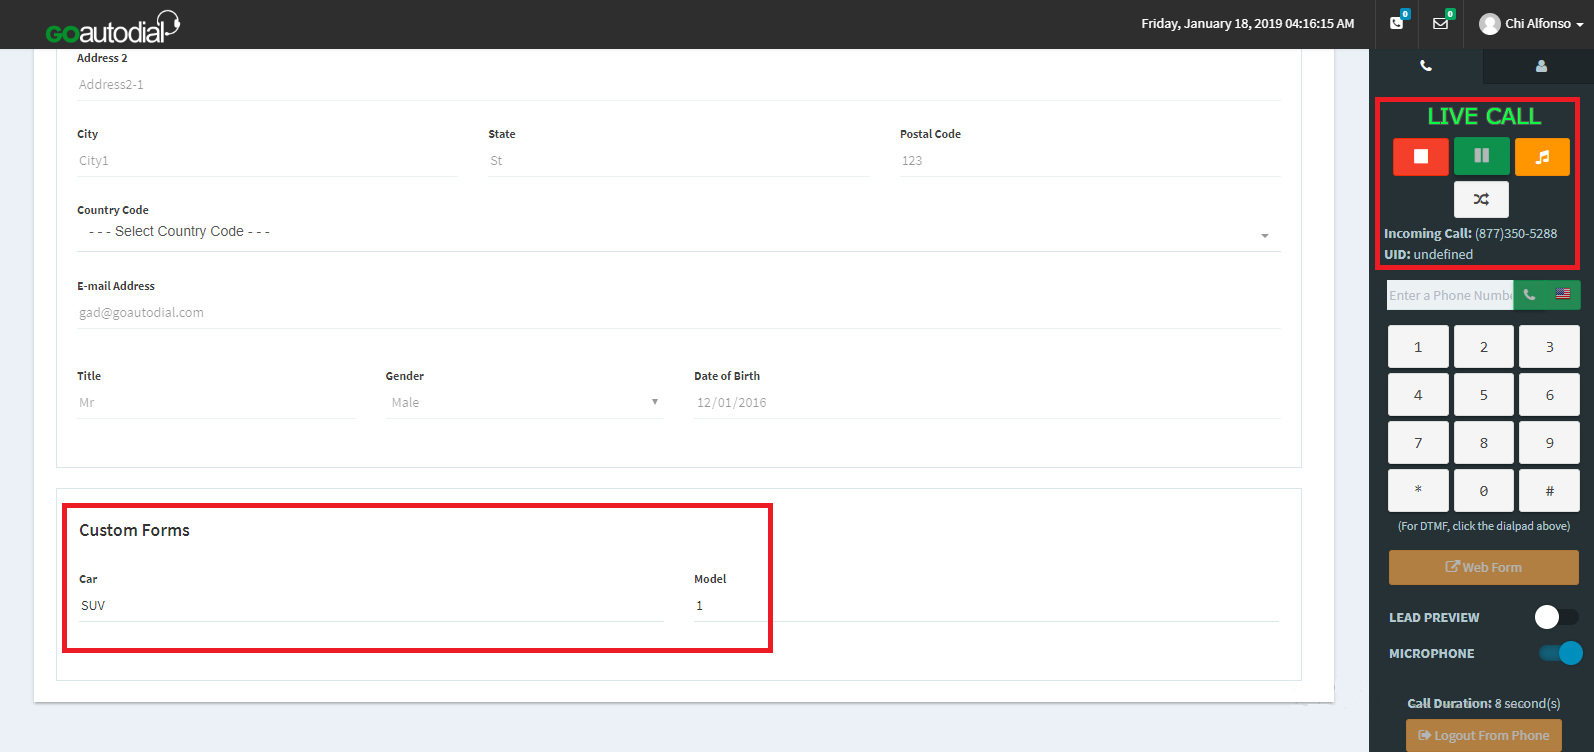
NOTE: We have created 2 additional custom field examples on this tutorial (Car, Model)

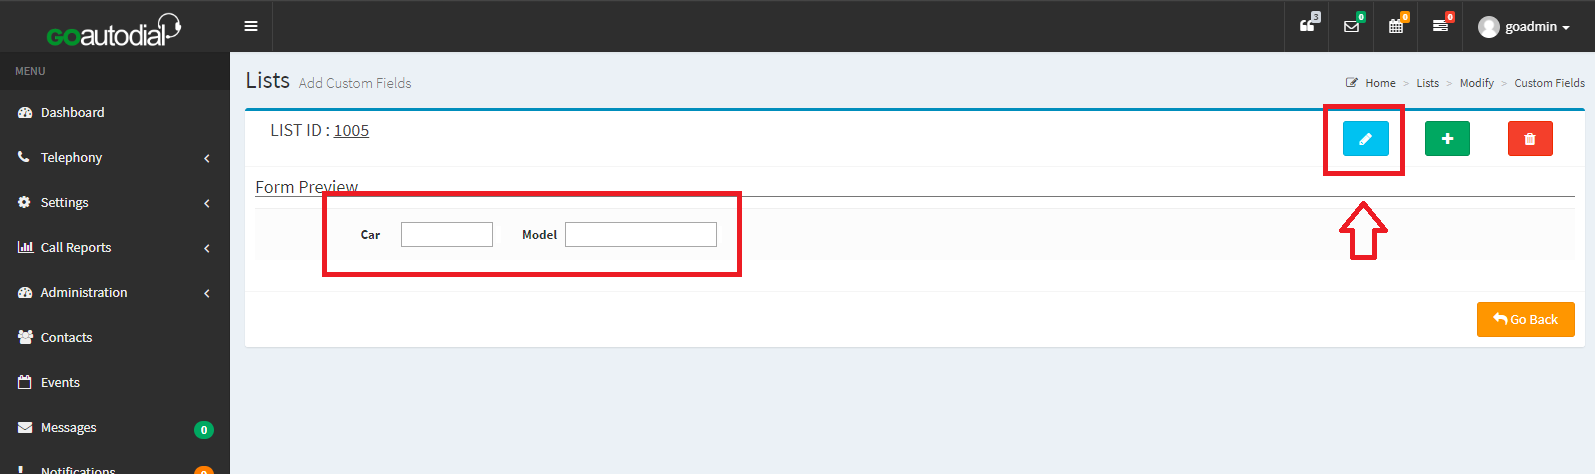
4. Here's the preview of the custom fields. if you want to edit your custom field just click the "Pencil" then update field once its done.
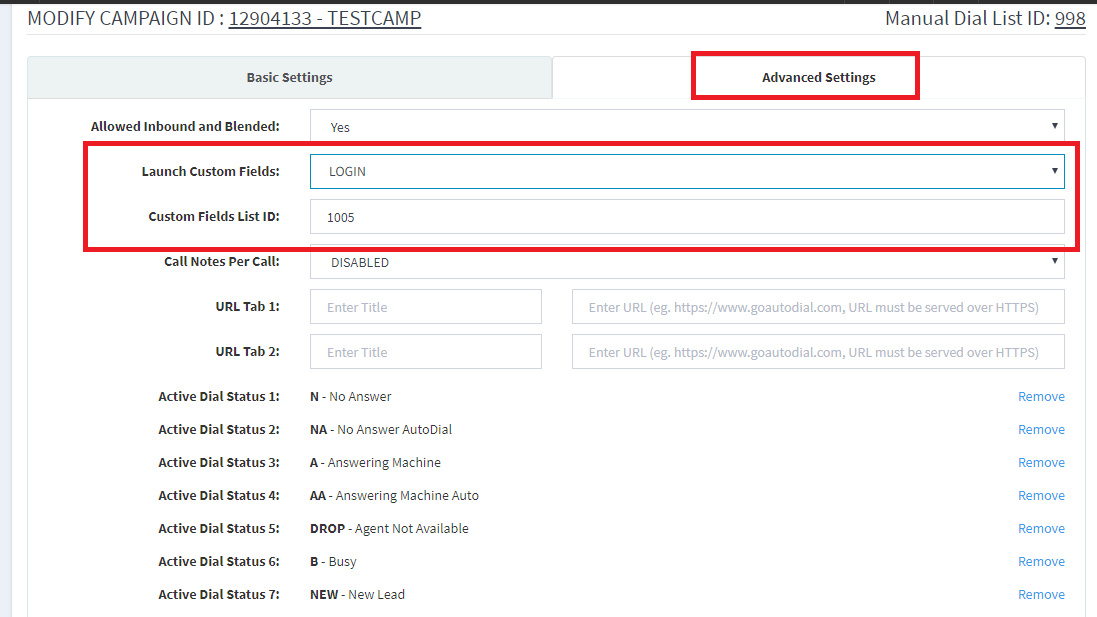
5. Campaign Settings set the following:
a. Launch Custom Fields = LOGIN
b. Custom Fields List ID = 1005 (your list with custom fields)
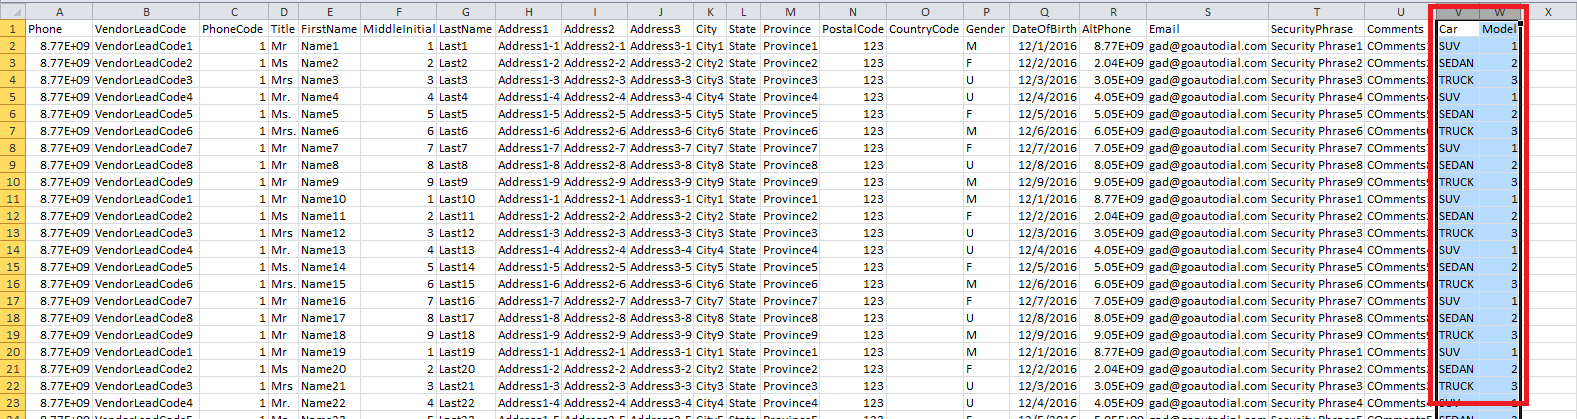
*Howto Upload Leads with Custom Fields
NOTE:Kindly follow the lead file format all the custom field must be next to comments field. and it must be saved as .csv
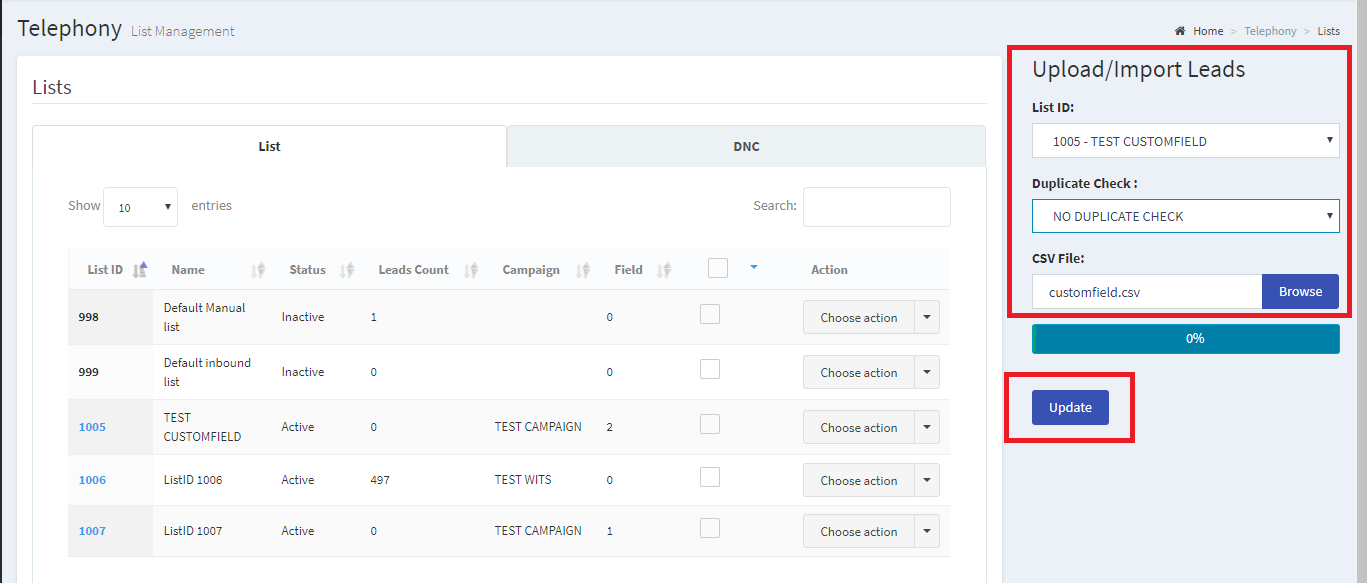
1. Upload your lead file with custom fields and make sure to choose the correct "LIST ID". Click "Update" once you've selected the List ID and the Lead file with custom field you can also use the duplicate checker. Once its done there will be a pop up informing you that the leads has already been uploaded.
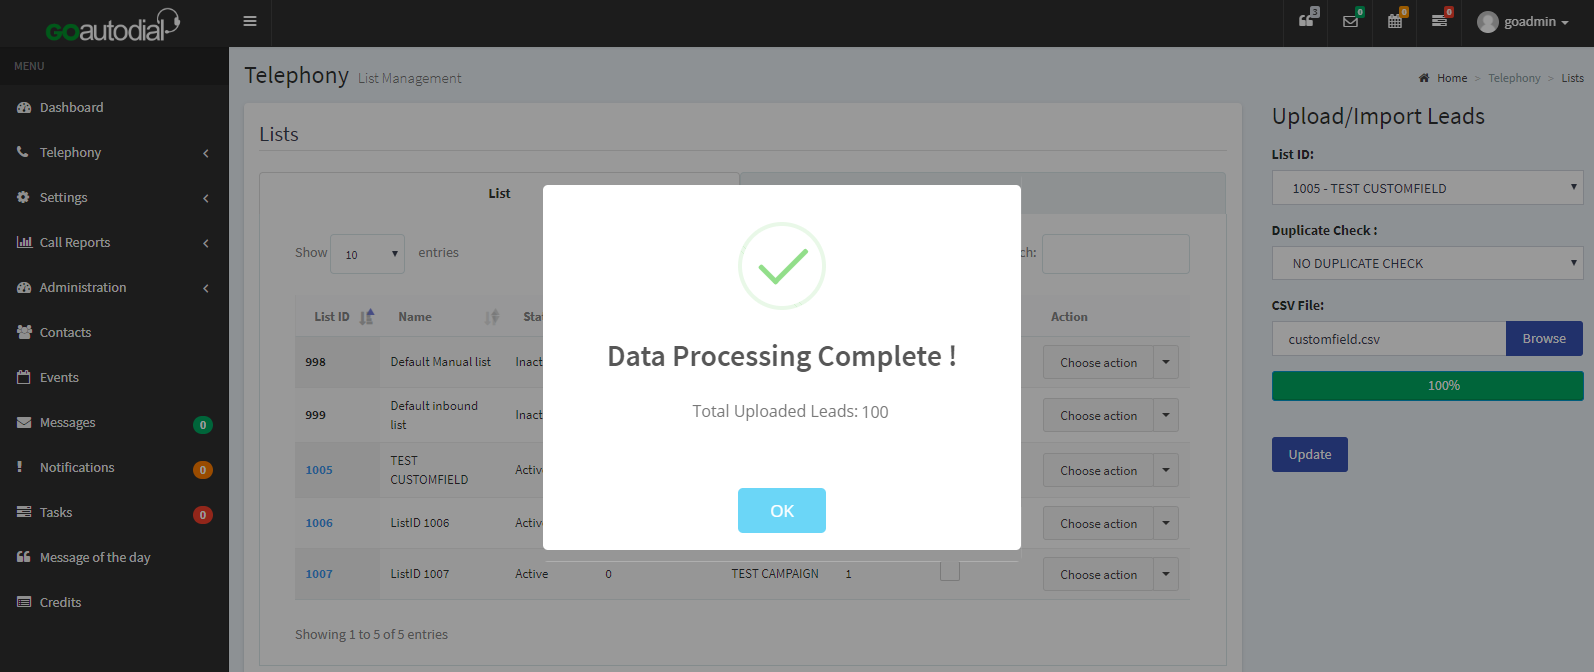
2. Once the uploading of the leads is done, you can now activate your list id and advise your agent to login to the campaign. Once the agent gets a "LIVE CALL", the customfields are on bottom of the agent UI.
Go to top